Card payment
Let's discover Paycashpay integration quickly.
HTTP GET Request (query string)
User will be redirected to our payment page
To initiate a transaction, make a simple HTTP GET call to the PaycashPay web service with query string parameters
Endpoint
https://api.paycashpay.com/v1/card/pages
Query parameters or form input expected
- apikey
required-----> Data Type (string) - currency
required----->NGN, GHS, ZAR, EUR, USD, XAF, XOF - amount
required-----> Data Type (number) - transactionID
required-----> Data Type (string) - description
optional-----> Data Type (string)
Sandbox
Test environment example link
GET https://api.paycashpay.com/sandbox/card/pages
Example
https://api.paycashpay.com/sandbox/card/pages?currency=USD&apikey=1234&amount=1000&transactionID=A10&description=test
Production
Live environment example link
GET https://api.paycashpay.com/v1/card/pages
Example
https://api.paycashpay.com/v1/card/pages?currency=USD&apikey=1234&amount=1000&transactionID=A10&description=test
HTTP GET Request
Another HTTP Get request method with form
URL
User will be redirected to our payment page
Test environment link : https://api.paycashpay.com/sandbox/card/pages
Production environment link : https://api.paycashpay.com/v1/card/pages
Example
<form action="https://api.paycashpay.com/sandbox/card/pages" method="GET">
  <div>
    <input type="hidden" name="transactionID" required/>
    <input type="hidden" name="apikey" value="your api key" required/>
    <input type="text" name="amount" placeholder="Amount" required/>
  </div>
  <div>
    <!-- You can also select the currencies that are suitable for your client, in our currencies list (XOF, XAF, NGN, GHS, ZAR, EUR, USD)  -->
    <select name="currency" required>
      <option value="USD">USD</option>
      <option value="EUR">EUR</option>
      <option value="ZAR">ZAR</option>
      <option value="NGN">NGN</option>
      <option value="GHS">GHS</option>
      <option value="XOF">XOF</option>
      <option value="XAF">XAF</option>
    </select>
  </div>
  <div>
    <!-- description is optional -->
    <input type="text" name="Description" placeholder="description" />
  </div>
  <div>
    <button type="submit">Submit</button>
  </div>
</form>
Overviews
Both methods above overview
Sandbox

Production
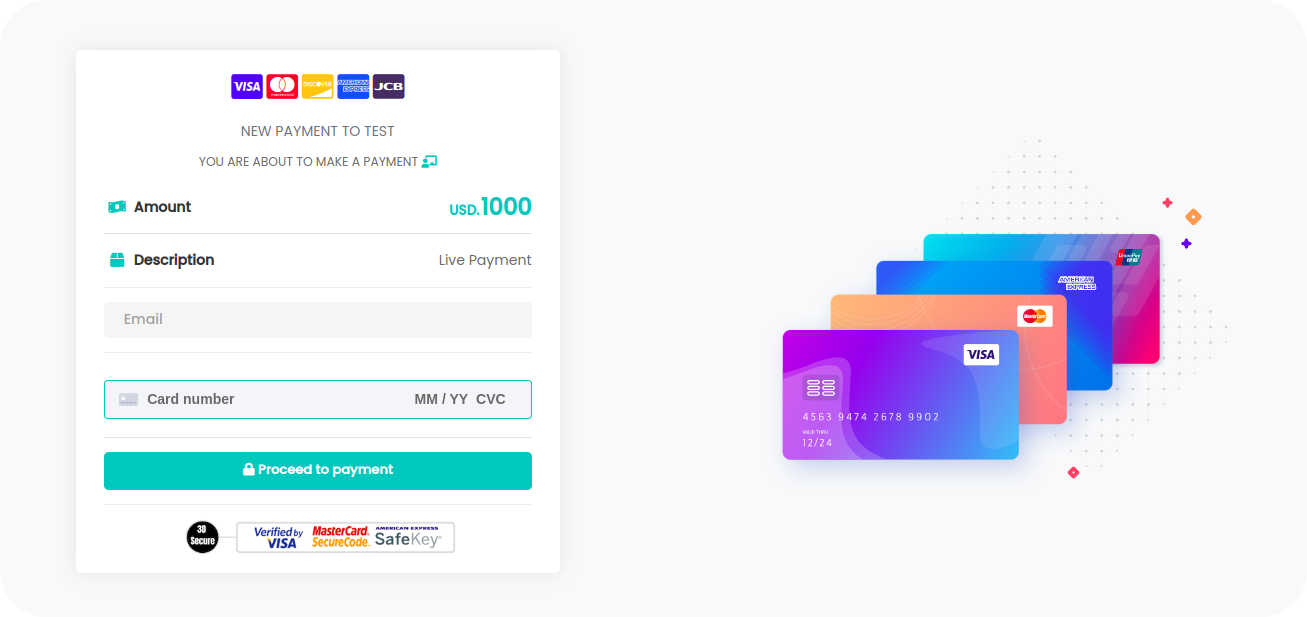
After payment successful
For both methods above, you should set the success URL in your account settings section.
If your successful URL didn't specify in your account, the user will be redirected to our default payment success page
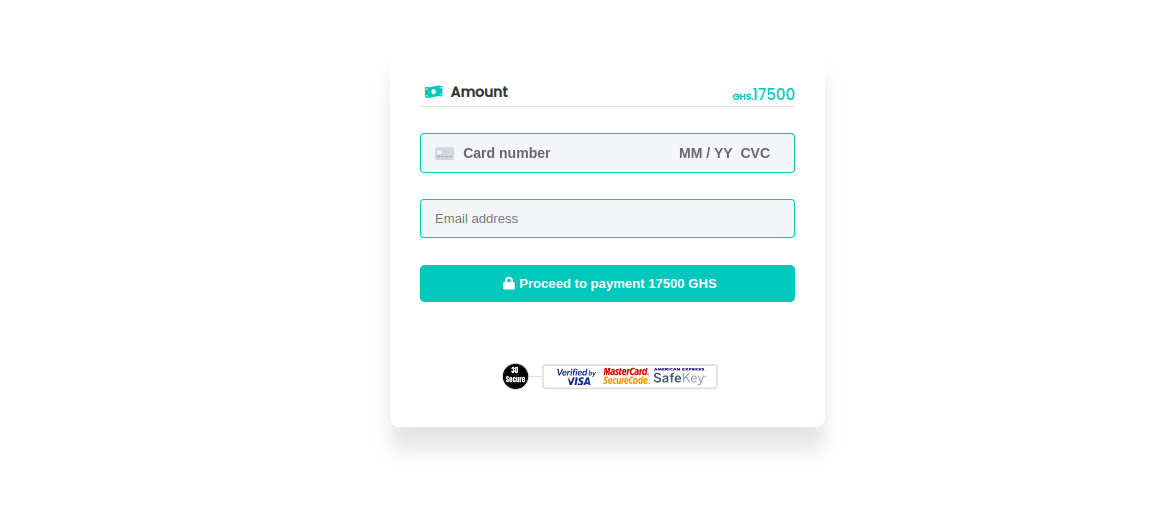
SDK
Host the payment, on your own website, without redirecting users to our payment page
step 1:
In your HTML file in the head add links below
<head>
  ...
  <link rel="stylesheet" href="https://cdn.paycashpay.com/css/main.card.css" />
  <script src="https://cdn.paycashpay.com/js/main.card.js"></script>
</head>
step 2:
Add the following code to your project
<body>
  ....
  <!-- Add this section of code to your code -->
  <form name="paycashpay">
    <div class="paycashpay-description">
      <span class="paycashpay-amount">
        <i class="meta-icon fas fa-money-bill-wave"></i>
        Amount
      </span>
      <span class="paycashpay-price">
        <span class="describe">
          <small class="currency"></small>
          <span id="price"></span>
        </span>
      </span>
    </div>
    <div id="paycashpay"></div>
    <div id="paycashpay-errors"></div>
  </form>
  ....
</body>
step 3:
Initial the payment
<body>
  ........
  <scrip>
    Paycashpay.PaymentInit({
      amount: 17500,
      currency: 'GHS',
      apikey: '3ac47418353259082622464a53661674',
      transactionID: 'DJJFJ',
      environment: 'sandbox',
      success_riderect: true,
      success_url: ''
    });
  </scrip>
</body>
Paycashpay.PaymentInit({
  amount: 17500, // data type integer
  currency: 'GHS', // NGN, GHS, ZAR, EUR, USD, XAF, XOF
  apikey: 'your api key' // data type string,
  transactionID: 'DD123', // data type string
  environment: 'sandbox', // environment: 'production' or 'sandbox'
  success_riderect: true, // data type boolean, true or false
  success_url: 'https://example.com/success' // data type string url,
});
If you set have set success_riderect to false, after payment was successful, your page will just reload.
And if you set success_riderect to false, just leave it like that, success_url: ""
SDK integration view
If you have successfully integrated the SDK, this is what you should have
Payment confirmation
Once the payment is made by the customer, PaycashPay will send a confirmation message on the URL you provided webhook url (HTTP POST Request endpoint).
the structure of the notification you'll receive is the same as the verification of payment status on below.
{
  type: 'card payment',
  txn: '9G9XG',
  transactionID: 'B12',
  currency: 'NGN',
  amount: 100000,
  network: 'visa',
  usd: 240.92,
  state: 'Successful payment',
  status: 3,
  date: 'Mon, May 23, 2022 9:55 PM'
}